
Review Section Component Using LWC
This article will teach us how to create a review form using LWC.


Business Use Case: XYZ company wants to create a review form to collect the review from the Users and then display those reviews. Users can post their Reviews and view Reviews posted by other Users.
Solution: For the above Use Case we will create a Review App page and we will create an LWC component that will help us store Reviews from Users to an SObject and then we will display the same using the for-each template. So let's start.
Let's take a closer look at our markup.
<template>
<lightning-card>
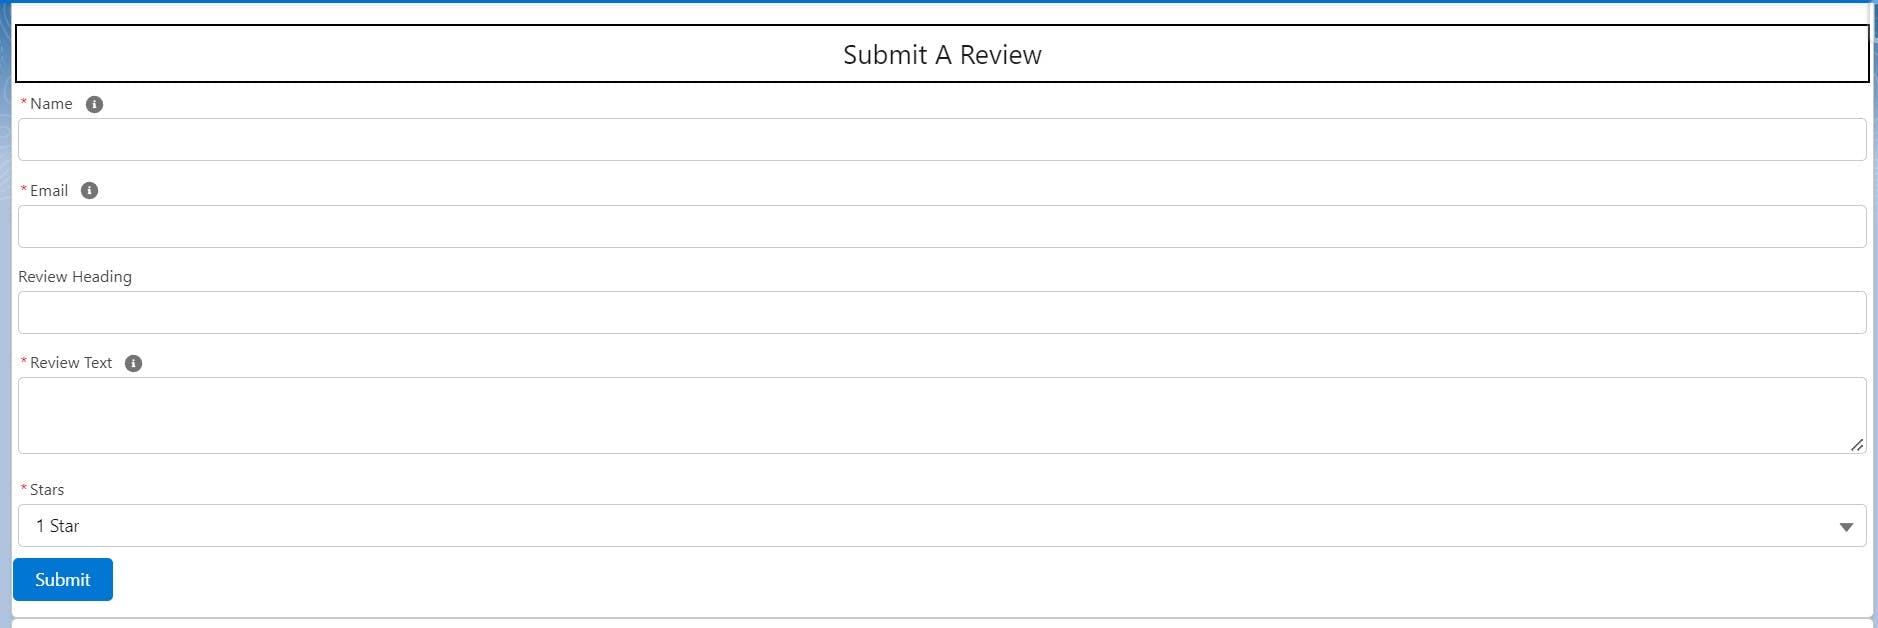
<h1 class="heading">Submit A Review</h1>
<div class="form" id="form">
<lightning-record-edit-form object-api-name="Review__c" onsuccess={handleReviewSubmit}>
<p><lightning-input-field field-name="Name__c"></lightning-input-field></p>
<p><lightning-input-field field-name="Email__c"></lightning-input-field></p>
<p><lightning-input-field field-name="Review_Heading__c"></lightning-input-field></p>
<p><lightning-input-field field-name="Review_Text__c"></lightning-input-field></p>
<p><lightning-input-field field-name="Stars__c"></lightning-input-field></p>
<p><lightning-button type="submit" variant="brand" name="Save" label="Submit"></lightning-button></p>
</lightning-record-edit-form>
</div>
</lightning-card>
<lightning-card>
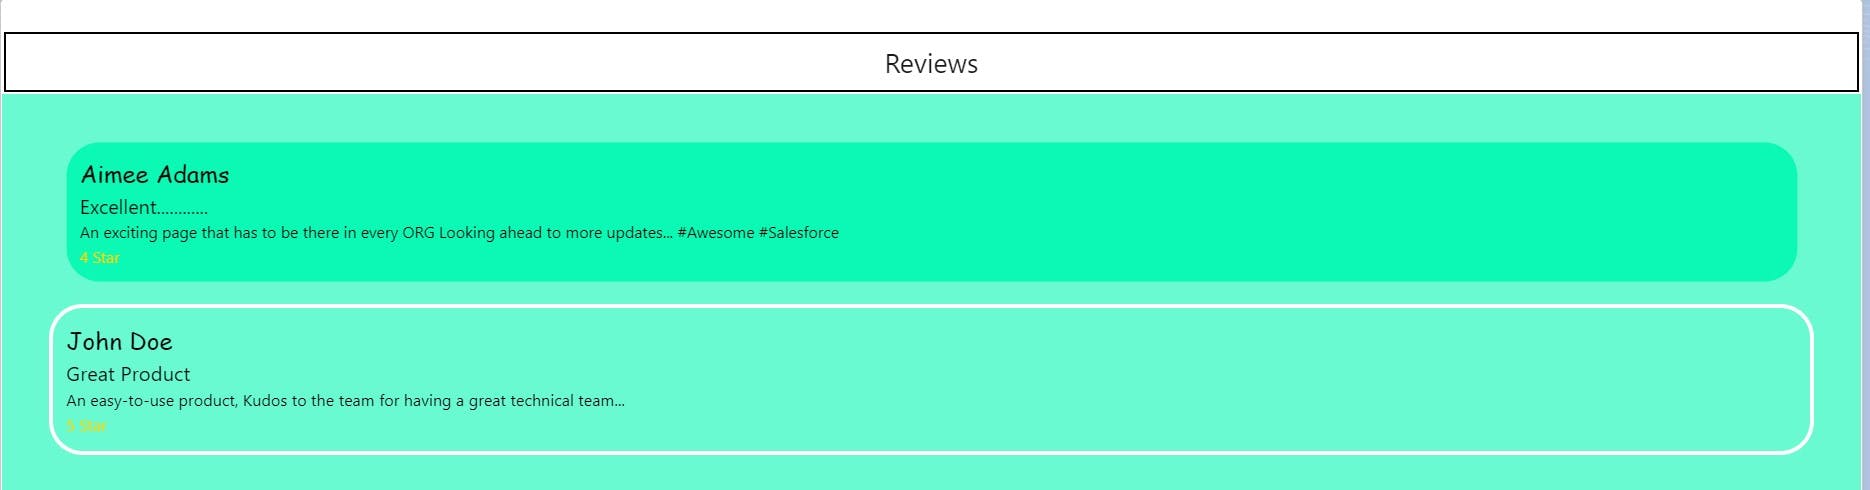
<h1 class="heading">Reviews</h1>
<div class="reviews">
<template for:each={reviews.data} for:item="rev">
<div class="review" key={value}>
<p key={rev.Id} class="name">{rev.Name__c}</p>
<p key={rev.Id} class="r-head">{rev.Review_Heading__c}</p>
<p key={rev.Id} class="r-text">{rev.Review_Text__c}</p>
<p key={rev.Id} class="r-star">{rev.Stars__c}</p>
</div>
</template>
</div>
<template if:true={reviews.error}>
<p>Error Occured : {reviews.error}</p>
</template>
</lightning-card>
</template>
Our markup contains two <template> tags, one for the review input form and the other for displaying the reviews posted.
The input form uses the <lightning-record-edit-form> which helps us to store the Review in an SObject named Review__c.
The second template is used to display the reviews posted by the end users and we have also used some styling using CSS (Refer the below code for styling).
*{
    margin:0px;
    padding:0px;

}
.heading{
    text-align: center;
    border: 2px solid black;
    margin: 2px;
    padding: 5px;
    font-size: 20px;

}

.reviews{
    background-color: #69fad1;
    padding: 20px;

}
.review{
    border:3px solid white;
    border-radius: 25px;
    margin: 15px;
    padding: 10px;


}
 .review:hover{
     transform: scale(0.98);
     background-color: #0cf8b5;
     transition: transform 0.6 ease;
     transition-delay: 200ms;
     border:none;

 }
.name{
    font-size: 18px;
    color:black;
    font-family: 'DynaPuff', cursive;
}
.r-head{
    font-size: 15px;
    color:black;
    font-style: bold;
}
.r-text{
    font-size: 12px;
    color:black;
}
.r-star{
    font-size: 12px;
    color:gold;
}
Our Frontend is good to go, now it's time for my favorite part #BackEnd. In order to fetch the data from the Review__c custom object, we will use an ApexClass The ReviewHelper.cls class will give the required data from the SObject and we will pass the same to the javascript file.
public with sharing class ReviewHelper {
    @AuraEnabled(cacheable= true)
    public static List<Review__c> getAllReviews(){
        try
        {
            return [select id, Name__c,Review_Heading__c, Review_Text__c, Stars__c from Review__c order by createddate desc];
        }
        catch (Exception e)
        {
            throw new AuraHandledException(e.getMessage());
        }
    }
}
Now let's use some Javascript to pass the data to our frontend we will use the Salesforce Wire adapter to get the data from the ApexClass and then pass it onto the markup. Refer to the Javascript file below.
import { LightningElement, wire } from 'lwc';
import { ShowToastEvent } from 'lightning/platformShowToastEvent';
import getAllReviews from '@salesforce/apex/ReviewHelper.getAllReviews';

export default class ReviewComponent extends LightningElement {
    reviewId;
    allReviews;
    error;

    handleReviewSubmit(event)
    {

        this.reviewId = event.detail.id;
        if(this.reviewId!=null)
        {
            const ev = new ShowToastEvent(
                {
                    title : 'Review Submitted',
                    message : 'You review has been submitted successfully',
                    variant : 'success'
                }
            );
            this.dispatchEvent(ev);
        }

        this.handleReset();
        this.pageRefresh();

    }

    //refresh the page
    pageRefresh(){
        window.location.reload();
    }
    handleReset()
    {
        this.template.querySelectorAll('lightning-input-field').forEach(element=>{
            element.value =null;
        })
    }
    @wire(getAllReviews)
    reviews;
}
We will use the component in the Lightning App Page only:
Refer to the Meta XML below.
Note: You can set the <target> based on your use case
<?xml version="1.0" encoding="UTF-8"?>
<LightningComponentBundle xmlns="http://soap.sforce.com/2006/04/metadata">
    <apiVersion>55.0</apiVersion>
    <isExposed>true</isExposed>
    <targets>
        <target>lightning__AppPage</target>
    </targets>
</LightningComponentBundle>
And we are done with our work.
Note: Additional stuff you have learned while reading the blog is how to clear Lightning-inputs on the click of a button using Query Selector. Bye have a great learning ahead........